Showing posts with label Cakes/Cupcakes/Cookies. Show all posts

Thursday, March 12, 2026

Black Forest Swiss Roll (Yule Log Cake) recipe by morEwish


If you love the classic Black Forest cake flavor, this Black Forest Swiss Roll (also known as a Yule Log) is a beautiful and delicious twist on the traditional cake. Imagine a soft chocolate sponge rolled with fluffy whipped cream and juicy cherries, then coated with silky chocolate ganache to resemble a rustic chocolate log.

This cake became extra special to me because the recipe inspiration comes from Zoha of Bake with Zoha, who baked this cake on the show Next Level Baker, where renowned chefs Gordon Ramsay, Carla Hall, and Candace Nelson described it as “delicious” and “the perfect slice” as she mentioned on her blog.

Being a big fan of Black Forest desserts, I knew I had to try it  and it absolutely lived up to the hype. The cake is light, creamy, chocolatey, and perfectly balanced with cherries.

Even though it looks like a bakery style showstopper, it’s actually made with simple ingredients and techniques.


Why You’ll Love This Black Forest Swiss Roll

• Light and airy chocolate sponge

• Classic chocolate and cherry flavor combination

• Elegant dessert that looks impressive

• Easier to make than layered cakes

• Perfect for gatherings, holidays, and celebrations


Tips for the Perfect Swiss Roll

• Always whip eggs and sugar until very fluffy

• Sift dry ingredients for a lighter batter

• Fold gently to keep the batter airy

• Roll the cake while it is warm

• Avoid overbaking the sponge

These small steps make a big difference in preventing cracks.


Frequently Asked Questions

Why did my Swiss roll crack?

Cracks usually happen if the cake is overbaked or rolled after it cools. Rolling the cake while it is still warm helps prevent cracks.

Can I use canned cherries instead of fresh cherries?

Yes! Canned cherries work well. If using canned cherries, simply reserve the syrup from the jar to brush over the cake.

However, I personally recommend fresh cherries or dark sweet cherries for the best flavor.

Can I make this cake ahead of time?

Yes. You can assemble the rolled cake with the filling and store it wrapped in plastic wrap in the refrigerator. Decorate with ganache or whipped cream just before serving.

How long does this cake last?

The cake stays fresh in the refrigerator for up to 3 days when stored in an airtight container.

Can I freeze a Swiss roll?

Yes. Wrap the undecorated cake tightly in plastic wrap and freeze for up to 1 month. Thaw in the refrigerator before decorating.


Instagram Reel:


Ingredients

Chocolate Sponge

4 large eggs (room temperature)

½ cup granulated sugar

½ cup all purpose flour

¼ cup cocoa powder

½ tsp salt

1 tsp baking powder

2 tbsp powdered sugar (for dusting)

Whipped Cream Filling

1½ cups cold heavy whipping cream

2 tbsp sugar

1 tsp vanilla extract

Pinch of salt

Chocolate Ganache

100 gm Milk Chocolate 

100 gm Dark Chocolate 

⅔ cup heavy cream

Cherries and Syrup

1 cup of cherries and remove the seeds.
2 tablespoons water
2 tablespoons sugar

You can use fresh cherries, dark sweet cherries, or canned cherries.

Many traditional recipes use maraschino cherries, but personally I recommend using fresh cherries or dark sweet cherries. They have a deeper flavor and taste much more natural. My family and I are not big fans of maraschino cherries, so fresh or dark cherries really enhance the taste of this cake.

Options

• 1 cup fresh cherries (preferred)

• Dark sweet cherries (canned)

• Canned maraschino cherries with syrup

If using canned cherries, simply reserve the syrup from the jar to brush onto the cake.


How to Make Black Forest Swiss Roll

1. Prepare the Chocolate Ganache

Add chocolate and heavy cream to a microwave safe bowl. Microwave in short 20 second intervals, stirring in between until smooth.

Let the ganache cool at room temperature until it becomes thick and spreadable.

2. Preparing Fresh Cherry Filling and Syrup

If you’re using fresh cherries, this simple step will create both the syrup and the filling.

Take cherries and remove the seeds.

Add them to a saucepan with water and sugar

Cook on medium low heat for about 10 minutes until the cherries soften and a light syrup forms.

Reserve the syrup to brush on the cake and remove the cherries. Once cooled, chop the cherries roughly to use as filling inside the cake.

This step adds a much fresher and richer cherry flavor.

3. Make the Chocolate Sponge

Preheat oven to 350°F and line a 10×15 inch baking sheet with parchment paper. Do not grease the pan.

Whisk the eggs and sugar on medium high speed for about 5–7 minutes until the mixture becomes pale, thick, and fluffy. It should almost triple in volume.

Sift together flour, cocoa powder, baking powder, and salt. Gently fold the dry ingredients into the egg mixture using a spatula. Be careful not to deflate the batter.

Spread the batter evenly into the prepared baking sheet.

Bake for about 10 minutes, or until a toothpick inserted in the center comes out clean. Do not overbake.

4. Roll the Cake While Warm

While the cake is baking, lay a clean kitchen towel on the counter and dust it generously with powdered sugar.

Once the cake is baked, loosen the edges and flip the cake onto the prepared towel. Carefully remove the parchment paper and dust the top of the cake with more powdered sugar.

Roll the cake gently with the towel from the short side. This step helps the cake develop “muscle memory”, making it easier to roll again later without cracking.

Place the rolled cake aside and allow it to cool completely.

5. Prepare the Whipped Cream

In a mixing bowl, whip the cold heavy cream with sugar, vanilla, and a pinch of salt until medium stiff peaks form.

Do not overwhip.

6. Assemble the Cake

Once the cake has cooled, carefully unroll it.

Brush the sponge generously with the cherry syrup.

Spread a layer of whipped cream evenly across the cake and sprinkle chopped cherries over the cream.

Roll the cake back tightly in the same direction.

It is completely normal if a little filling comes out during rolling.

Decorating the Cake

I followed the original method of coating the cake with chocolate ganache, then used a spatula to create rustic ridges so the cake resembles a wooden log.

However, another delicious decoration option is closer to the classic Black Forest cake look.

Instead of ganache you can:

• Cover the cake with whipped cream

• Add generous chocolate shavings

• Pipe whipped cream swirls

• Top each swirl with cherries 🍒

Both decoration styles taste amazing, it simply depends on the look you prefer.


Storage Tips

• Store the cake in an airtight container in the refrigerator

• Best enjoyed within 2–3 days

• For best freshness, decorate the cake the same day you plan to serve it


This Black Forest Swiss Roll is the perfect dessert if you love the classic combination of chocolate, cherries, and cream. It looks elegant and impressive, yet it’s surprisingly simple once you know the technique.

Whether you decorate it like a rustic Yule log or keep it classic with whipped cream and chocolate shavings, this cake is guaranteed to be a crowd favorite.

If you try it, don’t forget to tag @morewishcuisine on Instagram so I can see your creations!


Tuesday, April 8, 2025

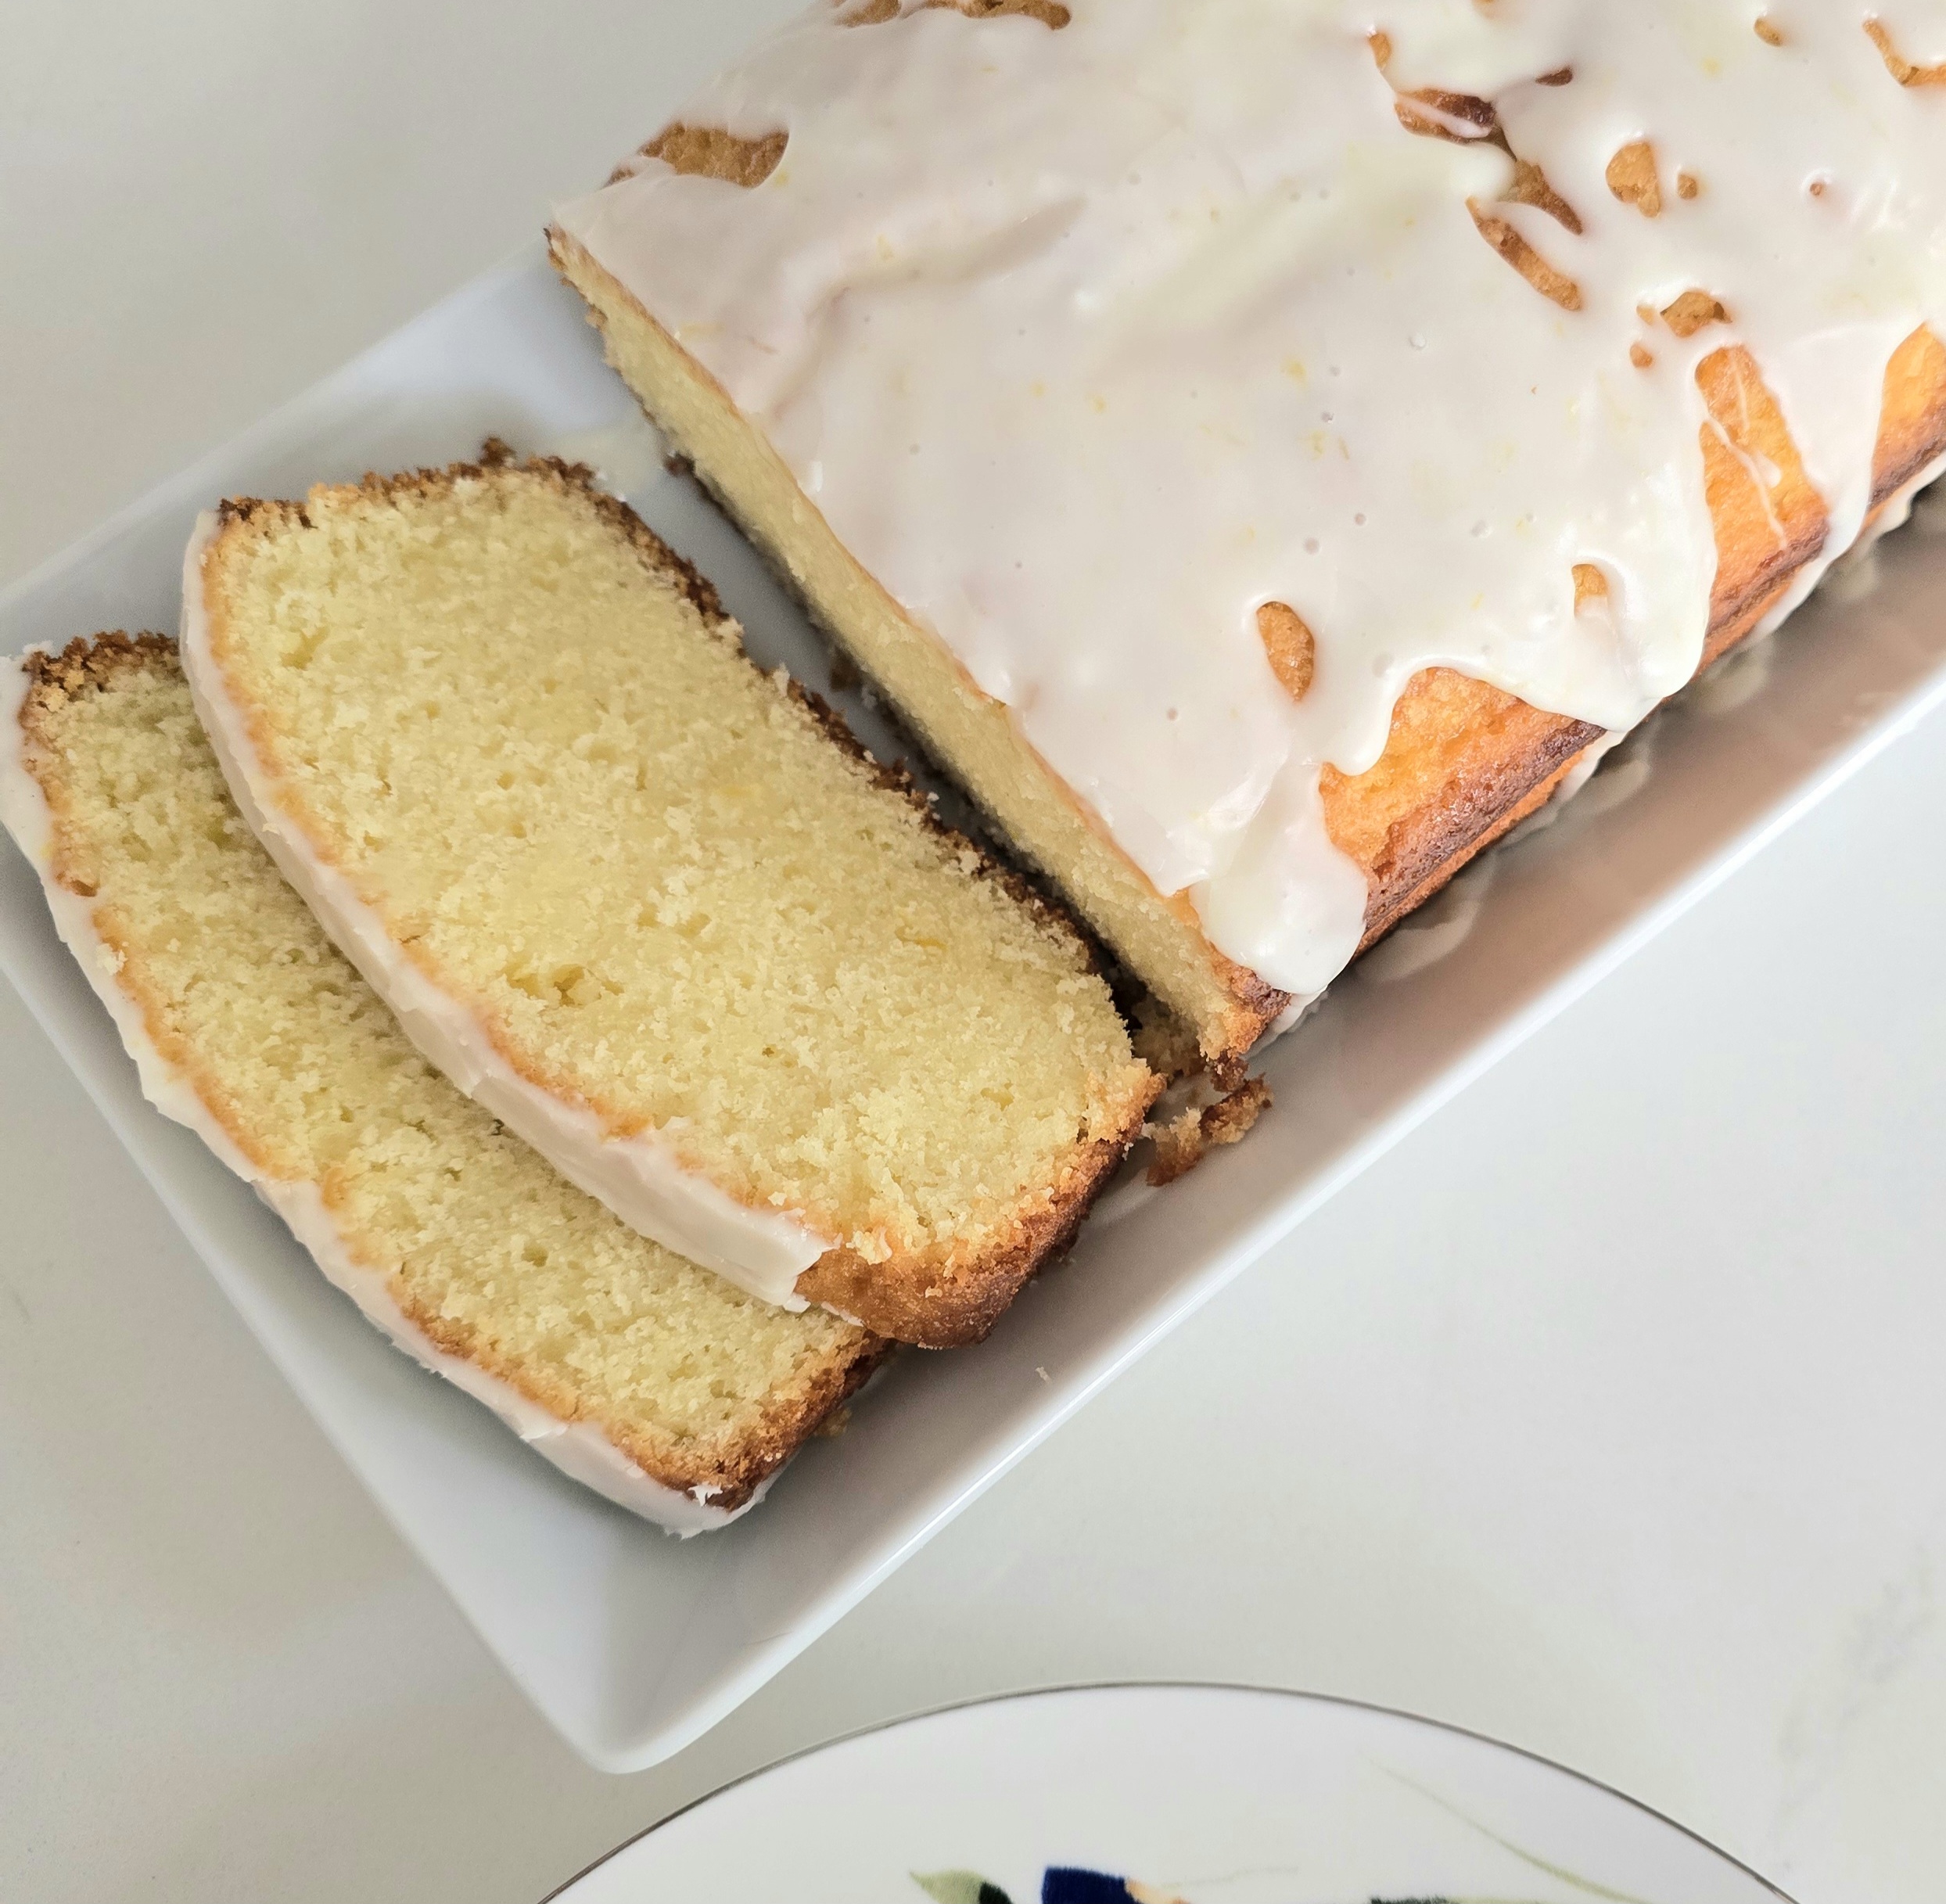
Lemon Loaf Cake recipe by morEwish


(Picture enchanted by AI)

Welcome Spring with a Homemade Lemon Loaf Cake

Spring is finally here, bringing with it the fresh scent of blooming flowers, warm sunshine, and the perfect excuse to bake something bright and delicious. What better way to welcome the season than with a homemade Lemon Loaf Cake? This cake is moist, buttery, and infused with fresh lemon flavor, making it a delightful treat for any time of the day.

If you’re boycotting 🚫 Starbucks but still crave their famous lemon loaf, this recipe is a must-try! Not only is it easy to make, but it also tastes even better than the store-bought version, with real, fresh ingredients that you can trust.


Why You’ll Love This Lemon Loaf Cake


Bright and Refreshing Flavor: The natural zest and juice from lemons create an irresistible citrusy burst of flavor.

Moist and Tender Texture: A perfectly balanced blend of butter, sugar, and eggs keeps this loaf soft and rich.

Simple Ingredients, Big Impact: You probably already have most of these pantry staples on hand!

Easy to Make: With just a few simple steps, you’ll have a homemade cake that rivals any café’s offering.

Perfect for Any Occasion: Serve it as a breakfast treat, afternoon snack, or light dessert after dinner. 

Pro Tips for the Perfect Lemon Loaf Cake


Making a loaf cake might seem simple, but a few essential tips can take your cake from good to absolutely spectacular.

Avoid Overmixing: Once you combine the wet and dry ingredients, mix just until combined. Overmixing will lead to a tough and rubbery cake.

Measure Your Flour Correctly: Too much flour will make the cake dry and dense. If you don’t have a scale, use the spoon-and-level method: fluff the flour with a spoon, scoop it into your measuring cup, and level it off with a knife.

Use Room Temperature Ingredients: Cold eggs and butter won’t mix as well, resulting in an uneven batter. If you forget to take the eggs out in advance, simply place them in a bowl of warm water for five minutes.

Maximize Your Lemon Juice Yield: Roll a room-temperature lemon on the counter before cutting it. This helps release more juice.

Zest Before Juicing: It’s much easier to zest a lemon before juicing, so do this step first.

Prevent Over-Browning: If the top of your cake is browning too quickly, loosely cover it with aluminum foil for the last 15 minutes of baking.


Step-by-Step Instructions


1. Prep Your Baking Equipment

Preheat your oven to 350°F (175°C). Grease a 9x5-inch loaf pan with butter or non-stick spray and line it with parchment paper for easy removal.

2. Mix the Dry Ingredients

In a medium bowl, whisk together the flour, baking powder, and salt. Set this aside for later.

3. Cream the Butter and Sugar

In a stand mixer fitted with the paddle attachment (or using a hand mixer), cream together the butter and sugar on medium speed until the mixture becomes light, fluffy, and pale in color. This step helps create a tender cake by incorporating air into the batter.

4. Add the Lemon Juice and Zest

Once the butter and sugar mixture is smooth, mix in the lemon juice and zest to infuse the batter with citrus flavor.

5. Incorporate the Eggs

Add the eggs one at a time, beating well after each addition. Scrape down the sides of the bowl as needed to ensure everything is evenly incorporated.

6. Combine the Wet and Dry Ingredients

With the mixer on low, add the flour mixture in three parts, alternating with the milk in two parts (starting and ending with the dry ingredients). Mix until just combined—do not overmix.

7. Bake the Cake

Pour the batter into the prepared loaf pan and smooth out the top. Bake for 65 to 70 minutes, or until a toothpick inserted into the center comes out clean. If the top is browning too quickly, tent the loaf with foil for the last 15 minutes.

8. Cool Completely Before Glazing

Allow the cake to cool in the pan for 10 minutes, then transfer it to a wire rack to cool completely before adding the glaze.

9. Make the Lemon Glaze

In a small bowl, whisk together the powdered sugar, lemon juice, and milk until smooth and slightly thick. Drizzle over the cooled cake for a beautiful finishing touch.

10. Slice and Enjoy!

Cut into slices and enjoy this delightful lemony treat! Serve it with a cup of tea, coffee, or just as is.

Instagram Reel:


Ingredients You’ll Need

For the Pound Cake:
2½ cups all-purpose flour (300g)
1½ teaspoons baking powder
1 teaspoon salt
1 cup unsalted butter, room temperature (227g)
1¼ cups sugar (250g)
4 large eggs, room temperature
3 tablespoons fresh lemon juice
1 tablespoon grated lemon zest
½ cup whole milk, room temperature (120mL)

For the Glaze:
1 cup powdered sugar (120g)
1 tablespoon fresh lemon juice
2 teaspoons whole milk


Ways to Enjoy Your Lemon Loaf Cake

With Tea or Coffee: A slice of this cake pairs beautifully with your morning cup of tea or coffee.

As a Dessert: Add a dollop of whipped cream or a scoop of vanilla ice cream for an extra indulgent treat.

For Brunch: Serve it alongside fresh fruit and yogurt for a refreshing springtime brunch.

Gift It: Wrap it up in parchment paper and a ribbon for a thoughtful homemade gift!

Storage Tips

Room Temperature: Store in an airtight container at room temperature for up to 3 days.

Refrigerator: Keep in the fridge for up to a week; warm up slices in the microwave before serving.

Freezer: Freeze slices individually wrapped for up to 3 months. Thaw at room temperature before eating.


There’s something incredibly satisfying about baking your own lemon loaf cake at home. Not only does it fill your kitchen with an amazing aroma, but it also brings the joy of a homemade treat made with love. Whether you’re making it for yourself, your family, or to share with friends, this lemon loaf cake is sure to impress.

So go ahead, embrace the flavors of spring, and bake this delightful cake today!


Saturday, March 29, 2025

Dubai Kunafa Chocolate Cake – A Fusion of Middle Eastern & Chocolate Indulgence


If you love the crispy, nutty flavors of kunafa and the rich decadence of chocolate cake, this Dubai Kunafa Chocolate Cake is the perfect fusion dessert! Inspired by the beloved Middle Eastern dessert kunafa, this cake brings together layers of moist chocolate cake, crunchy pistachio kunafa, and silky chocolate ganache.

The best part? It’s easy, quick, and visually stunning! You can use a boxed cake mix or even a store-bought chocolate cake for convenience. But if you're in the mood for homemade goodness, my moist chocolate cake recipe never fails to impress!


Why You’ll Love This Recipe

✔️ Simple & Quick – Use a store-bought cake or make one from scratch!

✔️ Crunchy & Creamy – The contrast of crispy kataifi pastry with smooth chocolate ganache is irresistible.

✔️ Perfect for Special Occasions – A stunning dessert that looks fancy but is easy to make!


Tips for the Best Dubai Kunafa Chocolate Cake


✔️ Make it ahead: The flavors get even better the next day!

✔️ Use high-quality chocolate: It makes a difference in taste and texture.

✔️ Customize it: Swap pistachios for almonds or drizzle with extra chocolate sauce!


Step-by-Step Instructions


Step 1: Bake the Chocolate Cake

1. Preheat your oven to 350°F (175°C) and grease a 9×13 pan

2. In a large bowl, whisk together sugar, flour, cocoa powder, baking powder, baking soda, and salt.

3. Add eggs, buttermilk, melted butter, and vanilla extract. Mix until well combined.

4. Slowly stir in boiling water—the batter will be thin, but that’s what makes the cake super moist!

5. Pour into the prepared pan and bake for 30-35 minutes, or until a toothpick inserted in the center comes out clean.

6. Let the cake cool slightly but keep it warm for assembling.


Step 2: Prepare the Pistachio Kunafa Layer


1. In a pan, melt butter and add the chopped kataifi pastry. Toast it over medium heat until it turns golden brown and crispy.

2. Remove from heat and mix in pistachio paste, crushed pistachios, and tahini to create a rich, nutty layer.


Step 3: Make the Chocolate Ganache


1. Heat whipping cream in a saucepan until warm (do not boil).

2. Pour the warm cream over chopped chocolate and let it sit for a minute.

3. Stir until smooth and glossy.


Step 4: Assemble the Cake


1. While the cake is still warm, soak it with milk to enhance its softness.

2. Evenly spread the pistachio kunafa layer over the cake, pressing it down gently.

3. Pour the chocolate ganache over the top, letting it coat the cake beautifully.

4. Garnish with chopped pistachios and pipe extra pistachio paste for a professional finish.


Step 5: Serve & Enjoy!

Let the cake set for at least 30 minutes before slicing. The combination of chocolate, crunchy kunafa, and nutty pistachios makes this a unique and indulgent dessert that will impress everyone at the table!


Instagram Reel:


Ingredients


For the Chocolate Cake


2 cups granulated sugar
1 ¾ cups all-purpose flour
¾ cup unsweetened cocoa powder
1 ½ teaspoons baking powder
1 ½ teaspoons baking soda
1 teaspoon salt
2 large eggs
1 cup buttermilk (or 1 tbsp vinegar mixed with 1 cup milk)
½ cup (1 stick) butter, melted
2 teaspoons vanilla extract
1 cup boiling water

For Soaking

½ cup warm milk


For the Pistachio Layer

1 tbsp butter
100g kataifi pastry, shredded
3-4 tbsp pistachio paste (plus extra for piping)
1 tbsp crushed pistachios
1 tsp tahini

For the Chocolate Layer


200g chocolate of choice (dark, milk, or semi-sweet)
100ml whipping cream

This cake is inspired by Walla_Abueid recipe, whose innovative take on flavors encouraged me to try this delicious fusion of chocolate and kunafa!

Would you try this kunafa-inspired chocolate cake? Let me know in the comments!


Thursday, March 6, 2025

Dreamy Delight Cold Cake – A Slice of Heavenly Bliss recipe by morEwish


Some desserts are more than just a treat—they’re a moment of pure joy! Dreamy Delight Cold Cake is exactly that. This no-bake, creamy, and refreshing dessert is the perfect balance of tropical flavors, nutty crunch, and velvety smoothness.

Traditionally known as Million-Dollar Pie, this classic icebox dessert has been around since the 1940s. Over time, taste preferences have evolved, and so has this recipe! Toasting the coconut and pecans brings out deep, rich flavors, while cream cheese and fresh lemon juice balance the sweetness. The result? A perfectly creamy, dreamy dessert that’s light yet indulgent.


Since I made this in a crescent-shaped silicone mold for Ramadan, I can confidently say—it’s a beautiful centerpiece for Eid as well! I ordered my mold from Temu, and while it was fun to use, unmolding was tricky, so be very careful! Decorate it after unmolding for the best results (I learned the hard way! 😉) 

Why You’ll Love This Cold Cake

✔ No-Bake & Effortless – A perfect make-ahead dessert for Ramadan or Eid.

✔ Creamy & Tropical – The combo of pineapple, coconut, and cream cheese is heavenly.

✔ Make It Your Own – Use all crushed pineapple or a mix with chunks for extra texture.

✔ Gorgeous Presentation – The crescent shape makes it a unique and festive treat.


Instagram Reel:


Ingredients

For the Crust

14 graham crackers, finely crushed (about 2 cups)
½ cup (1 stick) unsalted butter, melted
⅓ cup (66 g) granulated sugar
¼ teaspoon salt

For the Filling

1 ½ cups sweetened coconut flakes
1 cup chopped raw pecans
4 oz. cream cheese
1 (14-oz.) can sweetened condensed milk
¼ cup fresh lemon juice
1 (20-oz.) can crushed pineapple, drained (Make sure to squeeze out all the juice, or it will mess up the filling!) For added texture, you can mix ½ can crushed pineapple & ½ can pineapple chunks, or use just one kind—both work great!
1 (8-oz.) container Cool Whip for mixing in

For topping: Swirls of Cool Whip made with a star tip


Directions

1. Prepare the Crust

Grease a 9" deep pie dish, 9x13 baking dish, or a crescent-shaped silicone mold (like I used).

In a large bowl, mix graham cracker crumbs, melted butter, granulated sugar, and salt until it resembles wet sand.

Press the mixture firmly into the bottom and up the sides of your prepared dish.

For a crescent mold, be extra careful to press the crumbs into every nook and cranny!

Refrigerate to set while preparing the filling


2. Toast the Coconut & Pecans (Optional but Highly Recommended!)

Preheat oven to 350°F (175°C).

Spread the coconut flakes and chopped pecans evenly on a baking sheet.

Bake for 15 to 20 minutes, tossing halfway through, until lightly toasted.

Let cool for about 15 minutes. (Toasting enhances the flavor so much, but you can skip this step if needed.)


3. Prepare the Filling

In a large bowl, beat the cream cheese with a handheld mixer until smooth.

Add the sweetened condensed milk, lemon juice, and salt, and mix until well combined.

Stir in the drained & well-squeezed crushed pineapple and all but ½ cup of the toasted coconut and pecans.

Gently fold in one container of Cool Whip until evenly combined.


4. Assemble the Cake

Pour the creamy filling into the chilled crust and smooth the top.

If using a crescent mold, be extra careful while filling it in evenly.

Refrigerate for at least 4 hours or overnight.

If using a crescent mold, unmold carefully after chilling, then decorate. (Trust me—decorate AFTER unmolding!)


5. Decorate & Serve

Instead of spreading an extra layer of Cool Whip, I piped swirls using a star tip for a more elegant look.

Sprinkle the reserved toasted coconut and pecans on top.

Garnish with maraschino cherries for a festive touch!


This Dreamy Delight Cold Cake is more than just a dessert—it’s a celebration in every bite! Whether you’re making it for Eid, Ramadan, or any special occasion, this creamy, tropical delight will be the highlight of your table.

Try it, and let me know how yours turns out!


Wednesday, January 8, 2025

Dubai Viral Chocolate-Flavored Cheesecake recipe by morEwish


Dubai's vibrant culinary scene is always buzzing with new trends, and recently, a chocolate bar filled with crispy kunafa and pistachio cream has taken the city by storm. Inspired by this viral treat, I created the Dubai Viral Chocolate-Flavored Cheesecake, a luxurious dessert that mirrors the rich flavors and textures of the beloved chocolate bar.

This cheesecake is a delightful fusion of creamy, nutty, and chocolatey elements, with a base that captures the essence of crispy kunafa, a pistachio cream filling, and a luscious chocolate ganache topping. Let’s dive into the details of this irresistible dessert.


A Dessert Worth Going Viral

The Dubai Viral Chocolate-Flavored Cheesecake pays homage to the sensational chocolate bar with its crispy kunafa layer and pistachio cream filling. Each bite is a perfect harmony of crunchy, creamy, and chocolatey goodness. It’s the ultimate dessert for anyone who loves the unique flavors of the Middle East and the indulgence of chocolate.


Serving Suggestions

Serve this cheesecake as the highlight of your dessert table, paired with a cup of Arabic coffee or mint tea. It’s perfect for gatherings, celebrations, or simply as a luxurious treat to savor at home.


Ingredients Breakdown

For the Base:

Kadayif/Kataifi Pastry: Resembling the crispy layer of the chocolate bar, this pastry provides a crunchy base.

Unsalted Butter: Toasts the pastry to a golden brown, adding a rich flavor.

Pistachio Cream: Mimics the pistachio filling in the chocolate bar, adding a creamy nuttiness.

Tahini: Balances the sweetness with its slightly bitter undertones.

For the Pistachio Cheesecake Filling:

Cream Cheese: Forms the creamy, tangy base of the filling.

Pistachio Cream: Infuses the filling with a rich, nutty flavor.

White Chocolate: Adds sweetness and smoothness.

Vanilla Essence: Enhances the overall flavor profile.

Whipped ream: Whipped to add lightness to the filling.

Icing Sugar: Sweetens and stabilizes the whipped cream.

For the Ganache:

Dark Chocolate and Milk Chocolate: The combination creates a balanced chocolate topping.

Whipping Cream: When heated, it turns the chocolate into a smooth ganache.


1. Prepare the Base:

Finely chop the Kadayif pastry to ensure a uniform, crispy base.

Melt the butter in a pan and add the Kadayif. Toast the pastry until it's 80% browned, about 20 minutes, stirring constantly.

Transfer the toasted pastry to a bowl to cool. 

Mix the cooled pastry with pistachio cream and tahini. Set aside a few tablespoons for topping.

Press this mixture into a greased 9-inch springform pan and flatten it with the back of a spoon or a glass. Chill in the fridge while preparing the filling.

2. Create the Pistachio Filling:

Whisk the cream cheese, pistachio cream, melted white chocolate, and vanilla essence for 2-3 minutes until smooth.

In a separate bowl, whisk the cream with icing sugar until stiff peaks form.

Fold the whipped cream into the cream cheese mixture gently.

Pour the filling over the prepared base, smoothing it out with a spatula. Refrigerate while making the ganache.

3. Make the Ganache:

Heat the cream in the microwave or over a double boiler until it starts to bubble.

Pour the hot cream over the chopped dark and milk cchocolate or chocolate chips and let it sit for a minute.

Stir until the chocolate melts and the ganache is smooth. If necessary, use a double boiler to melt any remaining chocolate.

Pour the ganache over the cheesecake filling and spread it evenly.

4. Final Touches and Chilling:

Decorate with the reserved Kadayif mixture, additional pistachio cream, and chopped pistachios.

Chill the cheesecake in the fridge overnight or for at least 6 hours to set.

Remove from the fridge 10 minutes before serving to allow it to soften slightly.


Instagram Reel:


Ingredients:

For the base: 
300g Kadayif/Kataifi Pastry 
120g Unsalted Butter 
200g Pistachio Cream 
1 tbsp Tahini 

For the Pistachio filling: 
400g Cream Cheese 
200g Pistachio Cream 
200g White Chocolate 
1 tsp Vanilla Essence 
300ml Whipping Cream 
2 tbsp Icing Sugar 

For the Ganache: 
200g Dark Chocolate 
200g Milk Chocolate 
250ml Whipping Cream 

Inspired by Dubai’s viral chocolate bar, this cheesecake captures the essence of that delightful treat in every layer. Bring a slice of Dubai into your kitchen with this show-stopping dessert that’s sure to impress your family and friends. Get ready to create your own viral sensation with this Dubai Viral Chocolate-Flavored Cheesecake!