Showing posts with label Breakfast/Brunches. Show all posts

Tuesday, December 16, 2025

Easy Breakfast Potatoes (Crispy, Oven Baked) recipe by morEwish


If you’re looking for a no fuss breakfast side that pairs beautifully with eggs these Easy Breakfast Potatoes are it. Crispy on the outside, tender on the inside, and made with pantry staples, this recipe delivers diner style comfort right from your oven.

Similar to hashbrowns but chunkier and heartier, these potatoes are roasted at high heat, then finished under the broiler for that irresistible golden crust. Perfect for busy mornings, brunch gatherings, or even as a quick dinner side.


Why You’ll Love This Recipe

Minimal ingredients you already have

Hands off oven method (no constant stirring)

Crispy edges, fluffy centers

Easily scalable for a crowd

Naturally gluten free & vegetarian


Tips for Perfect Breakfast Potatoes

1. Use a silicone liner if you plan to broil. parchment paper may burn under high heat.

2. Salt right before baking. Letting salted potatoes sit can affect their texture.

3. Don’t overcrowd the pan.

4. Unpeeled works great, just scrub the potatoes well for a rustic finish.


Flavor Variations

Garlic Herb: Add 1 tsp garlic powder and dried thyme or rosemary.

Smoky Spiced: Swap paprika for smoked paprika or add a pinch of cayenne.

Breakfast Skillet Style: Toss with sautéed onions and bell peppers after baking.

Cheesy Finish: Sprinkle with shredded cheddar or parmesan right after broiling.


Instagram Reel:


Ingredients

2 lbs potatoes 

1/2 - 3/4 tsp salt, or to taste

1/4 tsp black pepper

1 tsp paprika, or to taste ( I used smoked paprika)

3 Tbsp oil (any high heat cooking oil)

1 Tbsp fresh parsley, finely chopped (optional garnish)

Notes:

Yukon Gold potatoes give a creamy interior, while Russets deliver extra crispiness, choice is yours 

You can peel the potatoes or leave the skins on, just scrub them well.


How to Make Breakfast Potatoes

1. Preheat the oven to 400°F. Line a large rimmed baking sheet with a silicone liner or parchment paper.

2. Prep the potatoes: Rinse, peel (if desired), and dice into ½ inch cubes.

3. Season: Place potatoes in a large bowl and toss with 3 Tbsp oil. Sprinkle with paprika, salt, and black pepper, then toss until evenly coated.

4. Bake: Spread potatoes in a single layer on the baking sheet. Bake for 20 minutes, or until fork tender.

5. Crisp: Quickly stir the potatoes, switch the oven to broil, and cook for an additional 2–4 minutes, until golden and crispy.

6. Serve: Remove from oven and garnish with fresh parsley, if desired. Serve immediately.


Storage & Reheating

Store: Refrigerate leftovers in an airtight container for up to 3 days.

Reheat: Warm in a hot oven or air fryer to bring back the crispiness.


If you try this recipe, I’d love to hear how it turned out! Leave a comment below or tag me on Instagram so I can see your breakfast spread. 🍳🥔


Tuesday, April 8, 2025

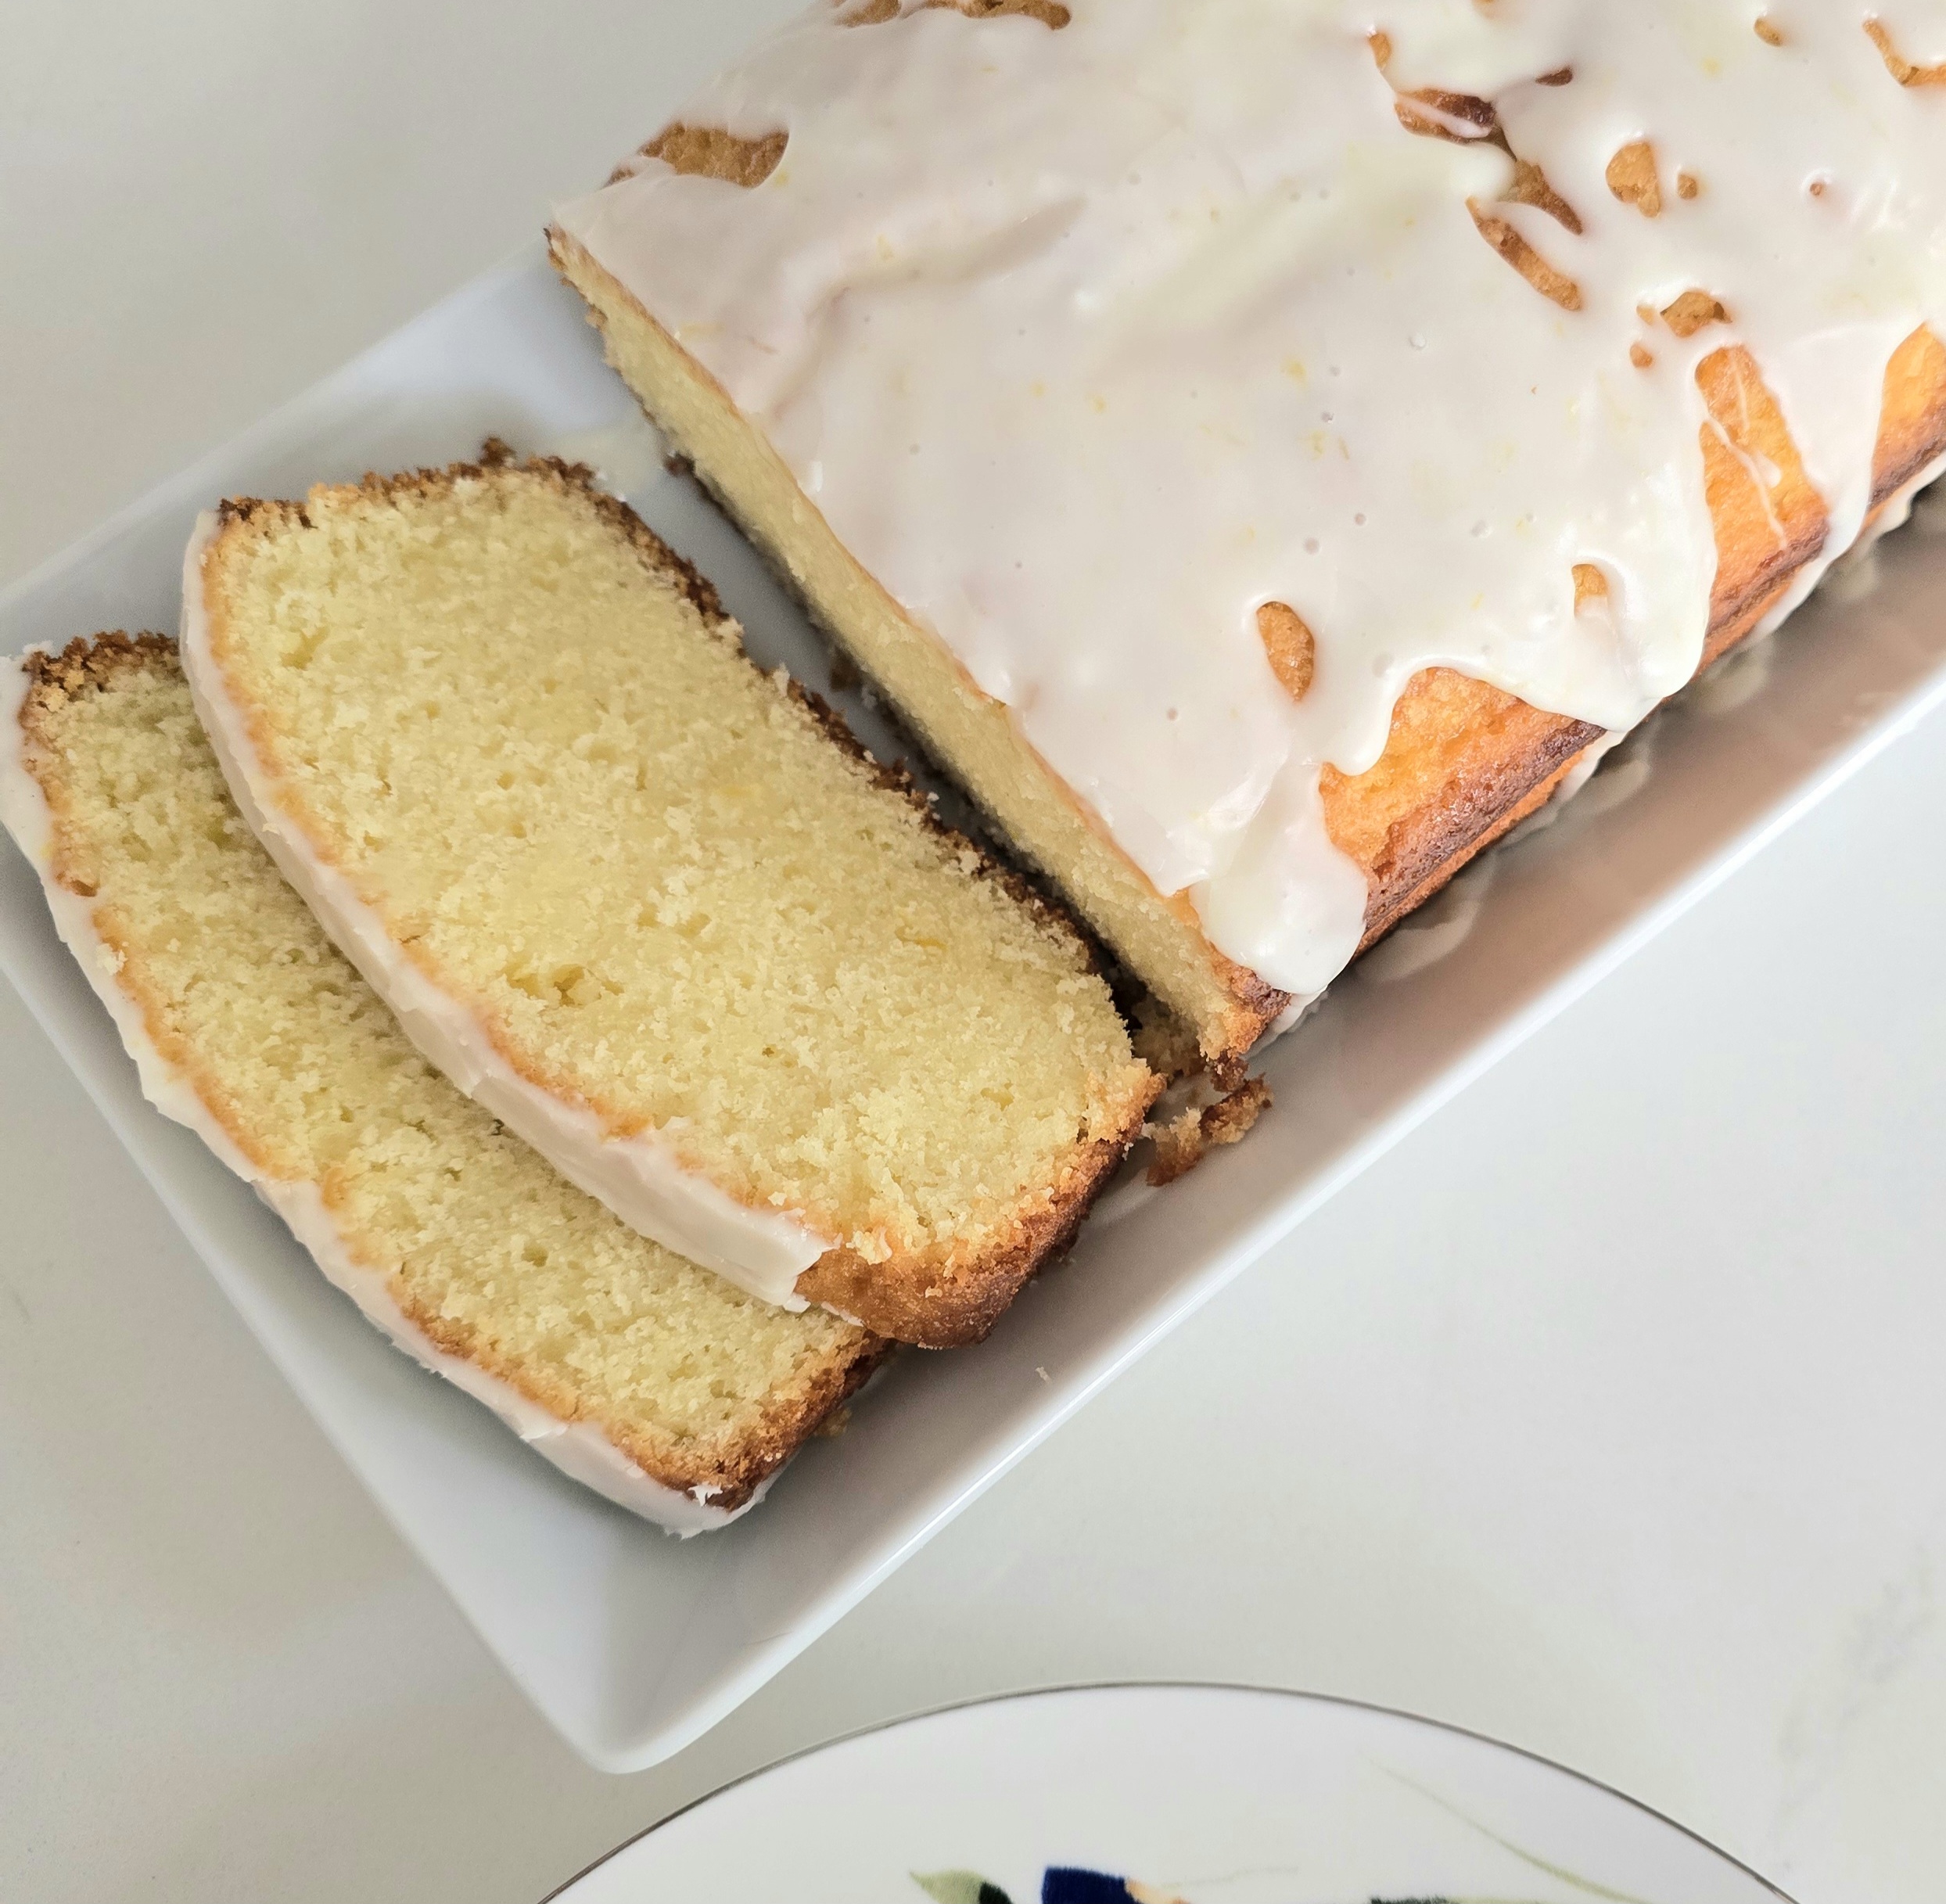
Lemon Loaf Cake recipe by morEwish


(Picture enchanted by AI)

Welcome Spring with a Homemade Lemon Loaf Cake

Spring is finally here, bringing with it the fresh scent of blooming flowers, warm sunshine, and the perfect excuse to bake something bright and delicious. What better way to welcome the season than with a homemade Lemon Loaf Cake? This cake is moist, buttery, and infused with fresh lemon flavor, making it a delightful treat for any time of the day.

If you’re boycotting 🚫 Starbucks but still crave their famous lemon loaf, this recipe is a must-try! Not only is it easy to make, but it also tastes even better than the store-bought version, with real, fresh ingredients that you can trust.


Why You’ll Love This Lemon Loaf Cake


Bright and Refreshing Flavor: The natural zest and juice from lemons create an irresistible citrusy burst of flavor.

Moist and Tender Texture: A perfectly balanced blend of butter, sugar, and eggs keeps this loaf soft and rich.

Simple Ingredients, Big Impact: You probably already have most of these pantry staples on hand!

Easy to Make: With just a few simple steps, you’ll have a homemade cake that rivals any café’s offering.

Perfect for Any Occasion: Serve it as a breakfast treat, afternoon snack, or light dessert after dinner. 

Pro Tips for the Perfect Lemon Loaf Cake


Making a loaf cake might seem simple, but a few essential tips can take your cake from good to absolutely spectacular.

Avoid Overmixing: Once you combine the wet and dry ingredients, mix just until combined. Overmixing will lead to a tough and rubbery cake.

Measure Your Flour Correctly: Too much flour will make the cake dry and dense. If you don’t have a scale, use the spoon-and-level method: fluff the flour with a spoon, scoop it into your measuring cup, and level it off with a knife.

Use Room Temperature Ingredients: Cold eggs and butter won’t mix as well, resulting in an uneven batter. If you forget to take the eggs out in advance, simply place them in a bowl of warm water for five minutes.

Maximize Your Lemon Juice Yield: Roll a room-temperature lemon on the counter before cutting it. This helps release more juice.

Zest Before Juicing: It’s much easier to zest a lemon before juicing, so do this step first.

Prevent Over-Browning: If the top of your cake is browning too quickly, loosely cover it with aluminum foil for the last 15 minutes of baking.


Step-by-Step Instructions


1. Prep Your Baking Equipment

Preheat your oven to 350°F (175°C). Grease a 9x5-inch loaf pan with butter or non-stick spray and line it with parchment paper for easy removal.

2. Mix the Dry Ingredients

In a medium bowl, whisk together the flour, baking powder, and salt. Set this aside for later.

3. Cream the Butter and Sugar

In a stand mixer fitted with the paddle attachment (or using a hand mixer), cream together the butter and sugar on medium speed until the mixture becomes light, fluffy, and pale in color. This step helps create a tender cake by incorporating air into the batter.

4. Add the Lemon Juice and Zest

Once the butter and sugar mixture is smooth, mix in the lemon juice and zest to infuse the batter with citrus flavor.

5. Incorporate the Eggs

Add the eggs one at a time, beating well after each addition. Scrape down the sides of the bowl as needed to ensure everything is evenly incorporated.

6. Combine the Wet and Dry Ingredients

With the mixer on low, add the flour mixture in three parts, alternating with the milk in two parts (starting and ending with the dry ingredients). Mix until just combined—do not overmix.

7. Bake the Cake

Pour the batter into the prepared loaf pan and smooth out the top. Bake for 65 to 70 minutes, or until a toothpick inserted into the center comes out clean. If the top is browning too quickly, tent the loaf with foil for the last 15 minutes.

8. Cool Completely Before Glazing

Allow the cake to cool in the pan for 10 minutes, then transfer it to a wire rack to cool completely before adding the glaze.

9. Make the Lemon Glaze

In a small bowl, whisk together the powdered sugar, lemon juice, and milk until smooth and slightly thick. Drizzle over the cooled cake for a beautiful finishing touch.

10. Slice and Enjoy!

Cut into slices and enjoy this delightful lemony treat! Serve it with a cup of tea, coffee, or just as is.

Instagram Reel:


Ingredients You’ll Need

For the Pound Cake:
2½ cups all-purpose flour (300g)
1½ teaspoons baking powder
1 teaspoon salt
1 cup unsalted butter, room temperature (227g)
1¼ cups sugar (250g)
4 large eggs, room temperature
3 tablespoons fresh lemon juice
1 tablespoon grated lemon zest
½ cup whole milk, room temperature (120mL)

For the Glaze:
1 cup powdered sugar (120g)
1 tablespoon fresh lemon juice
2 teaspoons whole milk


Ways to Enjoy Your Lemon Loaf Cake

With Tea or Coffee: A slice of this cake pairs beautifully with your morning cup of tea or coffee.

As a Dessert: Add a dollop of whipped cream or a scoop of vanilla ice cream for an extra indulgent treat.

For Brunch: Serve it alongside fresh fruit and yogurt for a refreshing springtime brunch.

Gift It: Wrap it up in parchment paper and a ribbon for a thoughtful homemade gift!

Storage Tips

Room Temperature: Store in an airtight container at room temperature for up to 3 days.

Refrigerator: Keep in the fridge for up to a week; warm up slices in the microwave before serving.

Freezer: Freeze slices individually wrapped for up to 3 months. Thaw at room temperature before eating.


There’s something incredibly satisfying about baking your own lemon loaf cake at home. Not only does it fill your kitchen with an amazing aroma, but it also brings the joy of a homemade treat made with love. Whether you’re making it for yourself, your family, or to share with friends, this lemon loaf cake is sure to impress.

So go ahead, embrace the flavors of spring, and bake this delightful cake today!


Thursday, November 4, 2021

Breakfast Burritos بوریتوس | Ihop style classic Burritos recipe by morEwish


Filled with sausage, eggs, cheese and hashbrown, these Ihop-style breakfast burritos are delish any time of day!


The breakfast giant Ihop unveiled an entire lineup of burritos and bowls that you can order up all day-long—whether you're dining in or opting for a to-go route. Last time we visited Ihop tried their classic burrito and my family throughly enjoyed it! So, I thought to recreate it at home and sharing it here with you guys!


They are so versatile and can be eaten any time of the day. Well, easily cutomizable as well. Feel free to mix up the fillings. You can add beans, add a different protein like steak or chicken, try them with roasted vegetables, or try replacing the sautéed pre-cut hash browns with crispy roasted breakfast potatoes or tater tots.


And you can freeze these burritos as well. Let the fillings cool slightly (about 10 minutes) before assembling so tortilla doesn’t get steamed and soggy inside as it rests. Layer cheese first then eggs (so eggs don’t dampen tortillas). Wrap each assembled burrito in a separate sheet of aluminum foil and then place them in an airtight container or resealable bag. Freeze up to 3 months.
Just remove frozen burrito from aluminum foil, wrap with a water dampened paper towel and reheat for about 3 – 4 minutes until heated through, or grill it.


Video in Urdu:


Video in English:


Ingredients:


Hash brown patties 6
Sausages 4 
Cheddar jack cheese 1/2 cup
Sautee vehetables 1/2 cup
Tortillas 6


Friday, October 15, 2021

Chocolate chip muffins چاکلیٹ چپ مفن recipe by morEwish


They are loaded with chocolate chips, tall muffin top and fluffy and moist in the texture. Tops are studded with extra chocolate and sugar to give them a delicious crunchy crust that sets these muffins over the edge.


I love enjoying a good muffin with a nice, warm cup of coffee, especially now that the fall weather is setting in. While girls love them warm with cold glass of milk. Besides flavor and texture, you’ll appreciate the simple ingredient list. You only need a few basic ingredients to make absolutely awesome chocolate chip muffins. Each ingredient is important and transforms boring muffins into bakery-style chocolate chip muffins! I add sour cream or buttermilk to this batter, it helps keep the muffins extra moist and I highly recommend it! And while measuring all purpose flour for this recipe, spoon into measuring cup and then level-off


Here I recomend stir the batter by gently folding it with a spoon or spatula and be careful not to over mix the batter, as that can produce tough muffins.
Be careful not to bake the muffins for too long. The muffins are done baking when you insert a toothpick into a muffin and it comes out clean or with a few moist crumbs.
These muffins stay fresh in an airtight container at room temperature, if you choose to refrigerate your muffins, I recommend heating them in the microwave for about 15 seconds before serving.


Video in Urdu:


Video in English:


Ingredients:


2 cups all-purpose flour
1 teaspoon baking powder
1/2 teaspoon baking soda
1/2 teaspoon salt
1 stick (1/2 cup) unsalted butter, melted
1/2 cup granulated sugar
1/2 cup packed light brown sugar
1-1/2 teaspoons vanilla extract
2 large eggs
1 cup sour cream or butter milk (1 cup milk with 1 tablespoon vinegar)
2/3 cup semi-sweet chocolate chips
3 tablespoons mini chocolate chips, for sprinkling on top
1-1/2 tablespoons coarse sugar or sanding sugar, for sprinkling on top


Wednesday, June 2, 2021

Date and Nut Bread ڈیٹ اورنٹ کی بریڈ recipe by morEwish


This quick bread is loaded with chopped dates and walnuts for a delicious combination. It’s a sweet, nutty and subtly chocolate-y and way good to enjoy for breakfast or at tea time.


When I did little reasearch, it appears that date and walnut breads have some origins in Scotland. And Grandma's back then would wash-out cans from let’s say green beans or corn or something and she would fill them half way and baked this bread in the actual cans. Which sounds retro and totally screams the 50’s. But today I am not baking bread in cans, I'am taking the ol’ loaf route.


For this recipe first soak dry dates in boiling water and baking soda, this will plump the dates and activate baking soda. You can wrap and freeze these loaves for impromptu coffee dates or impromptu hunger pangs. You could double the recipe, bake small loafs, wrap them in cute little packages and handout as gifts as well.
This bread is delicious for breakfast, smeared with butter or cream cheese- or just by itself. It's so good, you'll find yourself ready for another piece right away!


Video in Urdu:


Video in English:


Ingredients: 


8 ounces (225 grams) dried dates (chuwaray چھوارے), coarsely chopped (about 1 1/2 cups firmly packed coarsely chopped dates)
1/2 teaspoon baking soda
1/8 teaspoon salt
1 cup boiling water
1/2 cup walnuts
2 cups all-purpose flour
1/2 cup firmly packed brown sugar
1 1/2 teaspoons baking powder
1/4 teaspoon salt
1/2 teaspoon ground cinnamon (optional)
1/2 cup (113 grams) cold unsalted butter, diced
1 large egg, at room temperature
1 teaspoon pure vanilla extract

Recipe adapted from Joy of Baking


Friday, May 28, 2021

Avacado Toast آواکاڈو ٹوسٹ recipe by morEwish


Whole grain toast with mashed avocado, a runny egg and a sprinkle of crushed red pepper  – 5 ingredients, 5 minutes to make, it doesn’t get better than that!


Lately, I’ve been obsessed with avocado toast for breakfast, especially when I have avocados in my fridge that need to be used up. It’s a simple, healthy breakfast when you need something delicious and fast. Whether you toss them together for breakfast, enjoy them for lunch, or make them for a quick and easy dinner, I hope you love them as much as I do!


Made with good bread and ripe avocados, even simple avocado toast is delicious. However, it can also serve as a template for all sorts of fun toppings. Try adding chopped fresh herbs, a drizzle of extra-virgin olive oil, black pepper or red pepper flakes. Or if you don’t like eggs, leave them out! Swap the sunny side egg for poached egg and top with greens or swap with scrambled eggs and top with some salsa, or just use hard boiled eggs and add tomato and scallions.  I love to sprinkle "Everything but the bagel” seasoning on top. Or if you don’t like your avocado mashed, slice it! And if you have tahini sauce, cilantro lime dressing, pesto, or chipotle sauce on hand, even a small drizzle will kick your toast up a notch.


Video in Urdu:


Video in English:


Ingredients: 


1 avocado peeled and seeded
2 tablespoons chopped tomato
1 tablespoon chopped onion
1 teaspoon chopped cilantro
1 teaspoon lemon or lime juice
salt & pepper to taste
1/2 teaspoon red pepper flakes (optional)
2 slices whole grain bread or bread of choice
2 eggs fried, scrambled, or poached, optional


Monday, February 22, 2021

Oatmeal Peanut Butter Chocolate Bars اوٹمیل بارس recipe by morEwish


Soft and chewy peanut butter oatmeal bars made with healthy, wholesome ingredients. Perfect for a quick and healthy snack!


These Healthier Oatmeal Peanut Butter Chocolate Chip Bars are sweetened without refined sugar. Instead, they are sweetened with honey, you can use orignal maple syrup or agave! These bars do contain a small amount of sugar from the chocolate chips, unless you get chocolate chips without sugar. I think it’s worth it for that tiny bit of sweetness! You could also try switching out the chocolate chips for something naturally sweet like dried fruit.


I’ve made two more batches of these this past week because they are that good and Eashul loved them way too much! I wanted these bars to be on the healthier side, so I used oats and almond flour. When it comes to baking a little healthier, I love to use all purpose flour alternates you can use whole wheat flour or any gluten free alternate as well and it works so perfectly in these bars.

Annddd.. there’s zero butter in these bars too, just peanut butter and a little coconut oil. I also threw in some chocolate chips because chocolate + peanut butter is always a winning combination.


Video in Urdu:


Video in English:


Ingredients: 


1 cup rolled oats (uncooked)
1/4 cup flour (can use wheat flour or sub with almond, coconut or GF blend flour)
1/2 teaspoon cinnamon
1/4 teaspoon baking powder
1/4 teaspoon baking soda
1/4 teaspoon salt
2 tablespoon coconut oil
2 eggs
1/4 cup maple syrup
1/4 cup peanut butter (crunchy or creamy)
1/2 teaspoon vanilla
1/3 cup chocolate chip


Friday, February 12, 2021

Valentine Brunch Board برنچ آڈیاز Ideas by morEwish


I personally beleive there should not be a designated day to express love but here is no harm in showing love and effection on a day or two and make it even more special for your loved ones. Today I am sharing this Valentine themed Brunch board so you can enjoy it with your whole family! 


The awesome things about charcuterie boards or snack boards is that there is no end to the possible variations. There are few tips and trick to make it look pleasing which I already shared - you can check here! 
Today I added everything my family love for brunch, there is something here for everyone. I love switching up a few ingredients yields something new and amazing each and every time. On Valentine’s Day board you can add a small bowl of conversation hearts, red gummy bears, and LOTS of chocolate and whatever your family love! 


I have added heart shaped cinnamon rolls in my board today. I mean everyone loves cinnamon rolls but the regular shape is nothing to shout about, so make them into these gorgeous heart shape rolls and I am sure your loved ones will feel even sweeter biting into them.


To make the heart shaped pancakes, I use a heart shape pancake mold but you can use a heart shaped cookie cutter.  If you don’t have a cookie cutter, you can get artistic and make free form hearts, either way the heart pancakes will be delicious because they are made with love. It doesn't have to be Valentine's Day to serves these heart-shaped pancakes to show your loved ones just how much you care.


Now making Heart Shaped Eggs transforms the humble boiled egg into something fun. It was perfect for valentines day brunch board. A fun, yet protein packed healthy breakfast! While there are a number of gadgets available to change your eggs into special shapes, the good thing is what I am sharing today does not need any special moulds.


You can add any fruit to this board, I cut an appple into thin slices and shaped into heard and then served sliced strawberries for the pop of color and to stick with the theme. I served a bowl of nutella with starwberries today, strawberries + nutella is something everyone should enjoy every hour of every day. It’s kind of a simple idea, but it is something that is totally amazing! You can serve bowl or melted chocolate as well. 

Video in Urdu: 


Video in English:


Things I used: 


Store boaught cinnamon Rolls 
Pancake batter with/without chocolate chips
Pancake syrup
For each egg you will need…
  • A piece of cardboard cut from a juice or milk carton  (folded in half lengthwise.)
  • A round shaped chopstick
  • Two elastic bands
Strawberries
Nutella
Apple
Snacks of your choice
Candies/chocolates


Thursday, January 21, 2021

Stuffed Breakfast Biscuits ناشتے کے بسکٹس recipe by morEwish


Sharing delicious breakfast idea for you all today to help you start your weekend morning carefree, when you have the time for a hot, sit-down breakfast with the ones you love.


These hearty stuffed breakfast biscuits with sausage, eggs and cheese will let the delicious flavors melt in your mouth with every bite. These biscuits can be made for a great grab-and-go breakfast on busy mornings, you only need few ingredients.


You can customize your stuffed breakfast biscuits by swapping out the sausage for cooked chicken or any other meat. Or substitute different kinds of cheeses, like monterey jack, mozzarella or pepper jack for that kick, or add herbs and veggies for extra nutrition and flavor! 

Video in Urdu:


Video in English:


Ingredients:


8  breakfast sausage patties
6 eggs
4 tablespoon milk 
(Or just follow my scrambled eggs recipe)
1 recipe biscuit dough or 1 8-piece package refrigerated buttermilk biscuit dough
2- 4 tablespoon cheddar cheese
1/2 tsp salt
1/2 tsp black pepper
2 tbsp butter