KFC style chicken wings with a crispy coating that cracks in your mouth, with amazing seasoning and taste and air fried!
The first thing you are looking for is moist and juicy chicken. Wings are not the thickest of meats, and you want soft and juicy Kentucky Fried wings, that are not tough and dried after cooking. To ensure they stay juicy you will need to soak your chicken in vinegar bath. By soaking your chicken wings in vinegar bath, you give the crispy coating something to stick to. But perhaps more importantly vinegar is acidic. Acids tend to soften meats up and when they soak in, they break down the proteins ever so slightly meaning it eliminates chewiness. This also ensure that isn’t just the outer crispy coating that tastes good, the chicken inside will too.
The wings are so crispy on the outside but juicy and tender on the inside. You’ll never believe these weren’t cooked in a deep fryer! Cooking wings in an Air Fryer is a great way to save some calories because you don’t need to add any extra oil, but the wings taste as delicious as deep-fried.
I will not recommend to stack wings in an air fryer. The whole concept works based on air flow, so foods touching or on top of each other will not get that. If you want the crispiest air fryer wings, do them in a single layer, in batches if you have to.
Of all the salty, crunchy, savory snacks out there, stovetop popcorn is one of the tastiest and cheapest snacks. This cooking method for Stovetop Popcorn is so easy, results in nearly every kernel popping and nothing burns, leaving you with a nice big bowl of beautiful popcorn!
I’m on a mission to make sure everyone knows how to make popcorn from scratch. Today, I’m sharing all of my popcorn-making tips so you can make perfect stovetop popcorn at home, too. All you need are popcorn kernels, a good pot with a lid, oil and salt. You can do it!
Always use a good, heavy-bottomed pot. Don’t crank the heat up too high. It’s too easy to burn oil at temperature higher than medium heat, and if you catch even a whiff of smoke coming from the pot, your popcorn is going to taste burnt.
Start with two popcorn kernels to gauge the temperature. Once those pop, your oil is hot enough. Add the remaining kernels and remove the pot from the heat for 1 minute. This primes the popcorn to pop without burning the oil.
Tip the lid ever-so-slightly while the popcorn is popping. That way, the popcorn doesn’t steam itself in the pot and lose crispness. Continue cooking until the popping sound slows to about one pop per every few seconds.
Remove the lid and dump the popcorn into your serving bowl. Sprinkle the popcorn with a couple pinches of salt, to taste, and any other topping you would like. Toss the popcorn and serve immediately, for best flavor and texture. The popcorn will taste good for several hours, though. Season with salt carefully. You can always add more, but you can’t take away too much.
Video in Urdu:
Video in English:
Ingredients:
1/4 cup vegetable or coconut oil 1/2 cup popcorn kernels (yellow or white) Salt , to taste
I guess chicken tikka pizza is everyone's favourite and its a highest selling flavour among Pakistani's. I thought to create something with same flavour profile and add that to our oftar table! I created two different versions of it, Chicken tikka pizza puffs and Creamy chicken tikka pizza puffs - double the fun!
Now you can serve them as iftar snack for as a after school snack, they are sure to be loved. You can customize them with your favorite flavors and watch everyone devour them in minutes!
You can make these little puffs with wahtever pizza toppings you like! No matter what they are, they will fit into these little pizza pockets. For this version, I went super simple, classic and everyone's favourite chicken tikka chunks, pizza sauce, and cheese. Those are always a hit in our house, but you can add pretty much any of your favorites in this recipe.
After my family devoured the pizza puffs and approved the recipe, I decided to add something more in there! So I made roux (mixture of butter and flour) and made a white sauce then follwed same recipe mix it with chicken tikka chunks, pizza sauce and cheese and ohh my! I am telling you it's absolutely delicious and sure to be a favorite in your home!
Video in Urdu:
Video in English:
Ingredients:
Chicken Tikka:
Chicken boneless 1 lb, cut in very small chunks
Chicken tikka masala 2 tablespoon
Garlic 1/2 teaspoon
Ginger 1/2 teaspoon
Soy sauce 2 tablespoon
Vinegar 2 tablespoon
Pizza puffs:
Pizza saucee 2-3 tablespoon
Cheddar cheese 1/2 cup, shredded
Mozarella cheese 1/2 cup, shredded
Oregano 1 teaspoon
Vegetable of your own choice - bell pepper, jalepeno, mushrooms, onions, corn etc
Puff pastry sheets
Creamy Pizza Puffs:
Butter 2 tablespoon
Flour 2 tablespoon
Milk 1/2 cup
Pizza saucee 2-3 tablespoon
Cheddar cheese 1/2 cup, shredded
Mozarella cheese 1/2 cup, shredded
Oregano 1 teaspoon
Vegetable of your own choice - bell pepper, jalepeno, mushrooms, onions, corn etc
If you are Nutella & Lotus Biscoff spread lover these dates will definately make their way soon at your table for Iftar, snacking or for one-bite dessert option and make the perfect gift for your friends or loved ones! A bit of healthy and a bit of indulgence!
Last week I recieved a package from Ziyad Brand including their hand picked Medjool authentic Palestinian dates, which are 100% natural, no additives and no preservatives. These are perfect for making chocolate covered dates. These chocolate covered filled dates were sweet, caramel from the date, nutty from the nut butter and chocolatey from the exterior.
Are you one of those who eat Nutella by the spoonful?! Because I can definitely relate! This is a spin on that delicious spread with these Nutella stuffed dates. Not only Nutella I filled half of them with Lotus Biscoff spread. The best part is, you only need three ingredients to make this finger-lickin-good snack!
For this recipe I highly recommend using coconut oil in chocolate because the coconut oil helps the chocolate harden and it also gives it that nice shiny gloss! Now if you are not fans of dark chocolate can use semi-sweet chocolate but I highly recommend giving this chocolate covered dates recipe a go. You might be surprised how well-balanced this snack is when it comes to flavors. I used a fork to help me cover the dates in chocolate but you can also use a skewer or toothpick. You could also try almond butter or peanut butter as well. Now I recomend please don’t use freezer to speed up the setting process of chocolate, the chocolate will start “sweating” at room temperature.
Video in Urdu:
Video in English:
Ingredients:
8 ounces medjool dates, pitted ( I used Ziyad Brand Medjool dates) 3 ounces high quality dark chocolate 1 tablespoons coconut oil, solid Nutella and Lotus Biscoff cookie butter, stirred
This homemade chocolate granola is made with healthy ingredients but tastes so decadent! Serve with yogurt, milk, or enjoy by the handful! It’s crispy and crunchy and perfectly rich and decadent and chocolatey, without being overly sweet.
This homemade granola is quick, straightforward, and easy. Not to mention… cheaper than anything you’ll find in the store AND made without any preservatives. For crunch, I love adding some nuts. I used almonds and walnuts or this batch, but I also love pecans and cashews here. For a nut-free alternative, pumpkin seeds or sunflower seeds would be delicious as well. But you can customize it how you prefer with different add-ins, the flavor possibilities are endless, dried fruit, nuts, seeds etc
About that coconut oil. No, your granola will not taste like coconut. From the cocoa powder and the melty chocolate chips, you’ll find no remanence of coconut taste dancing around your tastebuds. I strongly suggest you use coconut oil here (and in any granola recipe calling for oil), but if you cannot get your hands on any, canola oil will work just fine.
I prefer adding chocolate chips, as soon as granola come out of oven. I recommend letting the chocolate granola cool completely on the baking sheet. This helps big clumps and clusters form, which we all know is the best part of granola. Once cool, then transfer to an airtight container for storage! You can leave container on the counter or in the pantry for up to one month.
It can be eaten for breakfast, as a snack, pre-workout, post-workout, midnight munchie, or sitting at your desk. I love serving it up with some yogurt and berries for breakfast. It also makes a great ice cream topping. However you serve it, I doubt it will last long!
Here are a few of my favorite ways to enjoy this decadent homemade granola: Over yogurt with fresh fruit Sprinkled on a bowl of ice cream On top of smoothies or smoothie bowls With milk in a bowl (better than cereal!) By the handful on the go!
Video in Urdu:
Video in English:
Ingredients:
3 cups oats you can use gluten-free rolled oats 1 cup chopped raw nuts (almonds, pecans, and/or walnuts are best) 1/4 cup desiccated or shredded coconut (unsweetened) 2 Tbsp chia seeds 3 Tbsp coconut or organic cane sugar (or other dry sweetener of choice) 1/3 cup cocoa powder 1/4 cup coconut (or avocado oil) 1/2 cup honey (plus more to taste or other liquid sweetener of choice like maple syrup, agave)
1/2 cup chocolate chips (vegan dark chocolate chips or chunks to make it dairy free)
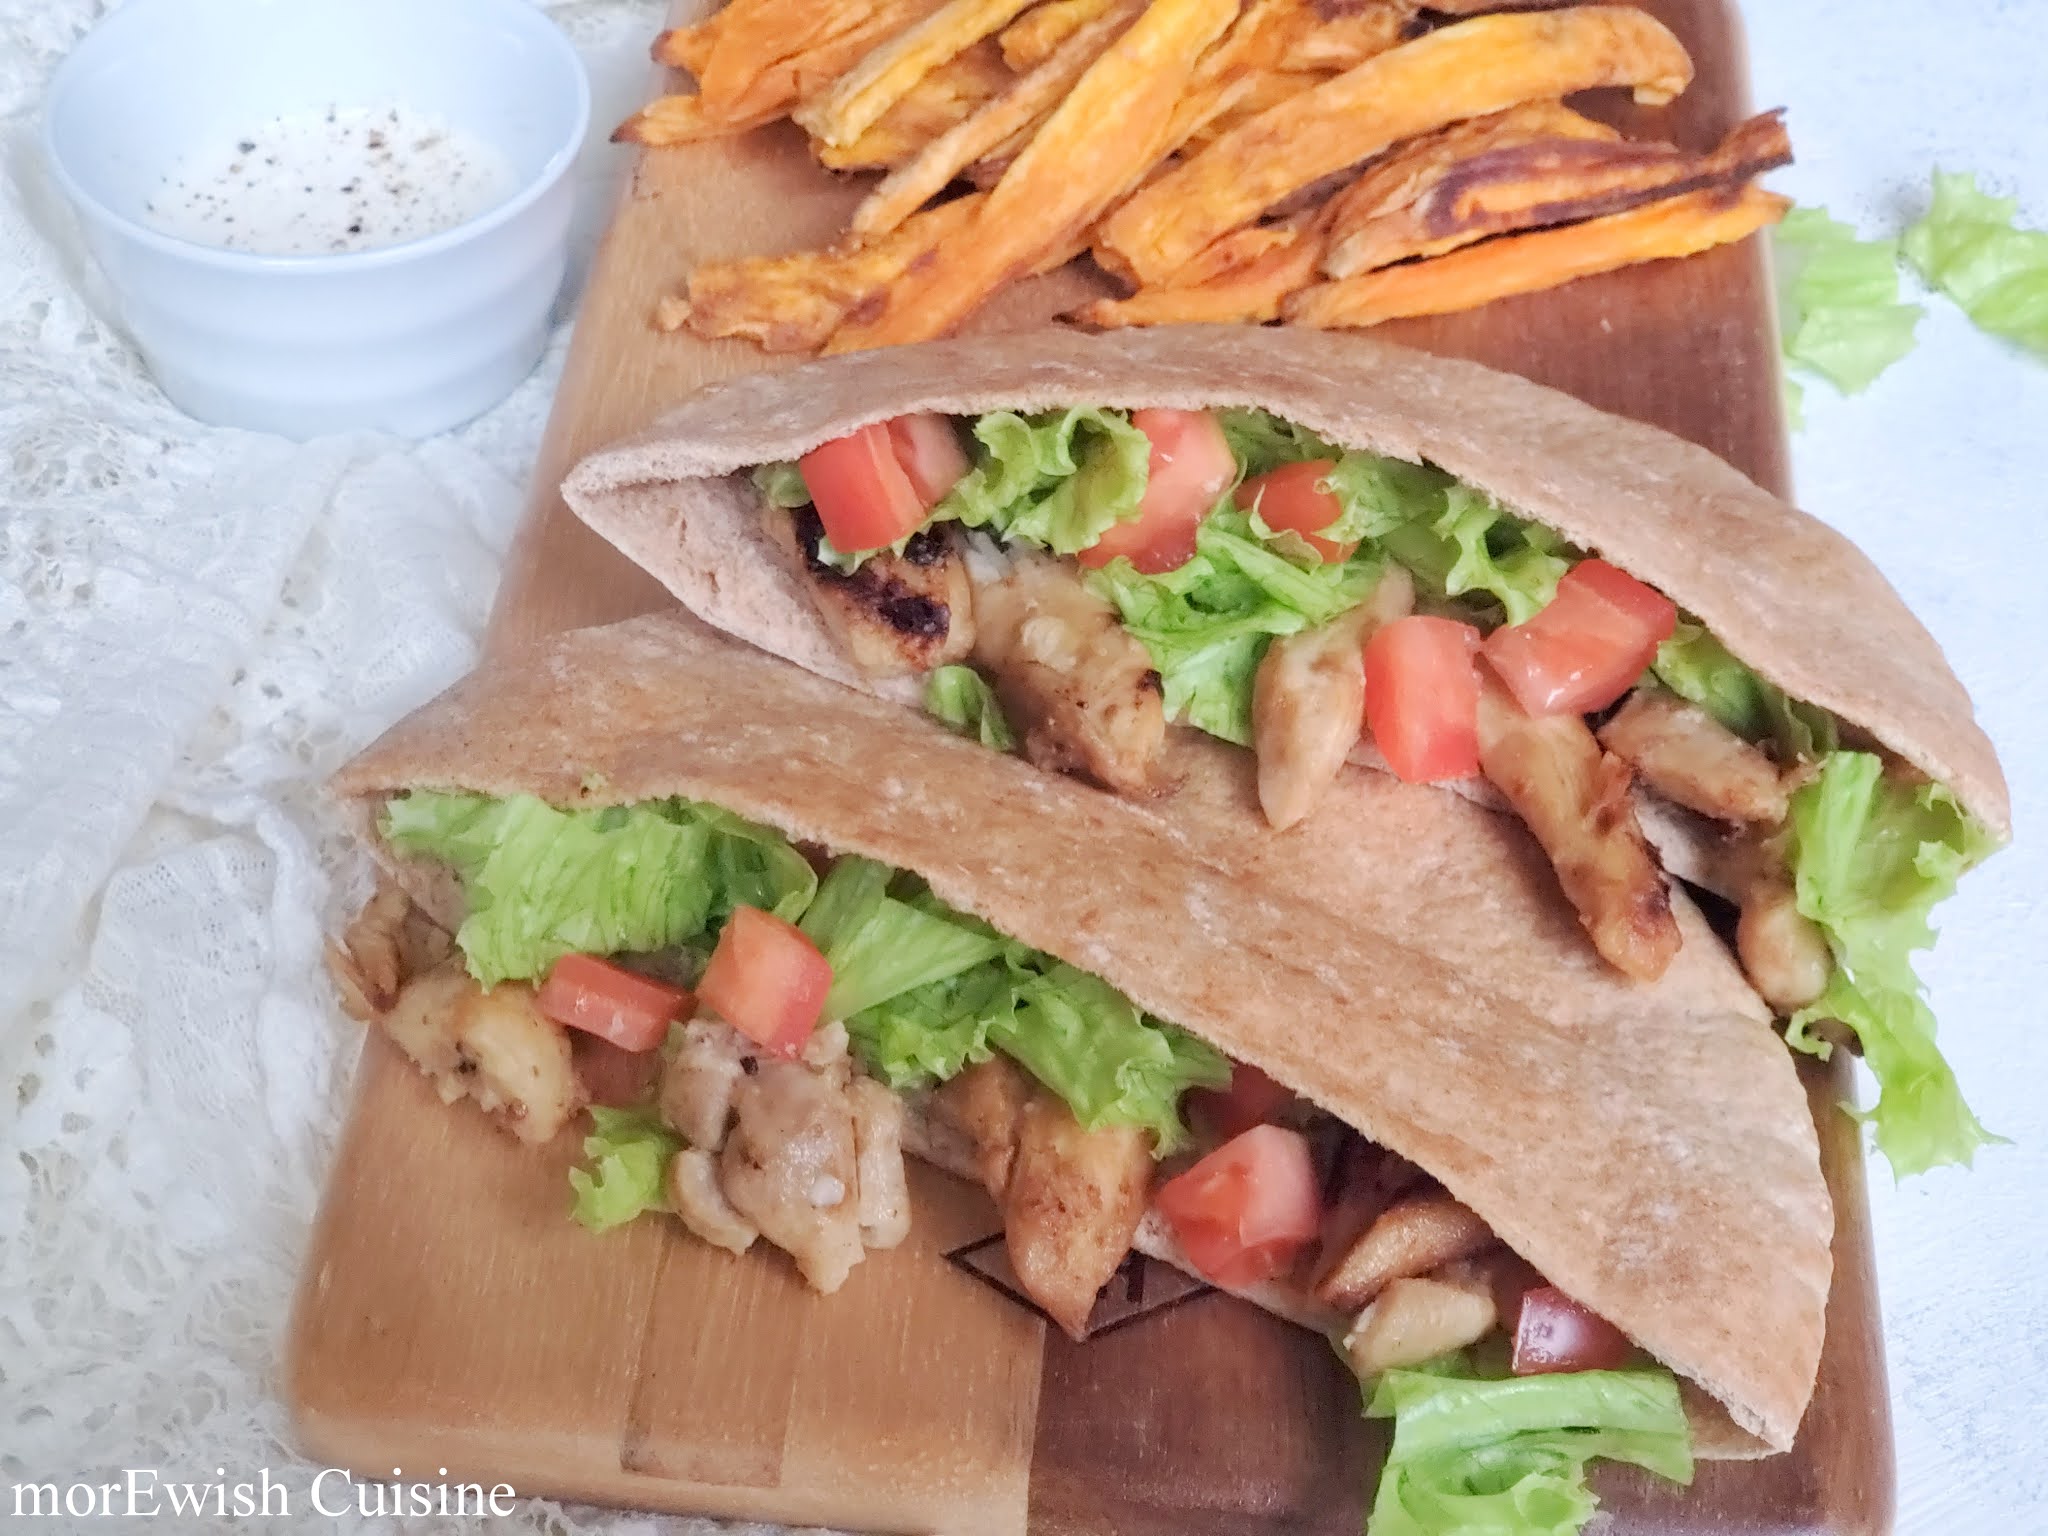
Weeknight meal planning can be hard. But this easy weeknight Chicken Ceasar Pita make family meal time simple: they're quick, fresh and delicious. I am certain they'll become menu regulars.
I think its important to enjoy your life in ever aspect and something that we all thoroughly enjoy is food… Which is why most of my recipes are our favorite comfort foods. We shouldn’t have to sacrifice flavor for a healthier dish… why not have both? And that brings me to THIS recipe…
This chicken caesar pita is absolutely delicious with chicken, romaine lettuce tossed in a homemade, creamy Greek yogurt caesar, with cheese and all wrapped up in a warmed pita…
I seved these pitas with sweet potato fries. They are salty-sweet, crunchy, and spicy if you wish. These oven baked sweet potato fries are so addictive!
Here are few tips which I learned along the way to get perfect crispy and tender sweet potato fries.
Slice your fries thinly. You want your fries to be about 1/4″ wide, or close to it. Thick fries never get crispy. Toss your sliced fries in cornstarch before oil. Cornstarch really helps to get the outsides crisp.
Dont overcrowd fries on a baking pan, they steam each other and never get crispy. Be sure that each fry lies against the pan, not piled on top of other fries.
Bake at 425 degrees Fahrenheit. Any lower, and your fries will be soggy. Any higher, and the oil will start smoking. Halfway through cooking, you’ll flip the fries with a spatula. This helps ensure that they bake evenly, turning perfectly golden on the outside and cooking through on the inside. Season last, if desired. Add salt before baking the fries, but wait to add any spices until after baking. Otherwise, the spices will burn and lose their flavor. I love to balance the sweetness of the fries with a little garlic powder and lots of freshly ground black pepper.
This is such a wholesome and filling meal that you will make time and time again. Not only will it keep you on track, but you’ll feel like you’re having a cheat meal at the same time!
After all kids are going back to school, some of you are sending your kids in person or some of us picked online session, one thing we all are doing is making lunches! Today I am sharing two different recipes for kids school lunches
Sauteed chicken with some basic seasoning, mixed with corn, cilantro and cream cheese, creating one of the delicious creamy chicken spread! You can add any other vegetable or herbs as well. I added green chilies for the heat but can easily be subsituted by crushed red pepper.
You can use the same filling and fill in small tortillas for chicken and cheese taquitos. These sandwiches can freeze very well as well. Right after assembling just freeze in ziplock bags and toast them before serving.
The second recipe is almost like a treat for kids, especially those who are remote learning. They can get advantage of having a hot lunch (of course if its doable by parents/guardians).
These loaded fries can easliy assembled in less than 15 minutes, again you add any other sauces and meat of your choice, and serve your kids as a Friday lunch or as a weekend treat. Its great for game night and as a party snack
Video in Urdu:
Video in English:
Ingredients:
Cheesy Chicken and Corn Sandwiches:
Boneless chicken 1 lb, (I used cooked) Oil or butter 1 teaspoon Onion, chopped 1/4 cup Green Chili 1 Garlic 1 teaspoon Salt 1/2 tsp Black pepper 1/4 tsp Cumin powder 1/2 tsp Cream cheese 6 oz Corn 1/2 cup
Cilantro 3 tbsp
Loaded French fries:
Frech fried cooked half tray Cream of mushroom soup 1/2 can (cooked with 1/4 cup of milk) Coooked chicken tikka chunks 1/4 cup Cheddar cheese, shredded 1/4 cup
Nachos meets Baked potatoes aka Potato nachos. Almost like nachos but instead of tortilla chips using sliced potatos with same nacho topings! If you are a fan of Nachos and Baked Potatoes, this is the recipe for you!
Potatoes instead of nachos is brilliant! Once they are seasoned and baked you can pretty much add what you want. Follow the basic recipe and try it with different things. Finger food is always a winner for a party, these nachos feed a crowd, and you can easily double the recipe without much extra effort if you have a bigger party.
Video in Urdu:
Video in English:
Ingredients:
4 potatoes cut into slices about 1/8 to 1/4 of an inch thick
3 tablespoons olive oil
1/2 teaspoon salt
1/4 teaspoon black pepper
4 ounces cheddar cheese, shredded
4 ounces mozarella cheese, shredded
Chopped tomatoes, jalapenos, cilantro and Sour cream for garnish
Classic Chicken Salad sandwiches were a staple of parties, probably because they were so easy to make and eat. A creamy simply seasoned mayonnaise mixed with chicken plus the power of nostalgia makes them Best Sandwich Ever!
You can use leftovers from last night’s dinner or leftover rotisserie chicken or grilled chicken as well for this recipe. I simply cook chicken in water with basic ingredients, just ensure the chicken is cooled and shred or chop the chicken into bite sized pieces.
As this is a classic chicken salad recipe, I added celery for crunch, and little bit of chopped cilantro for a flavor. But you can add any nuts, veggies, and fruit for added flavor and texture.
Mayonnaise is the base of this recipe, you can use miracle whip dressing or light mayo as well. You can get creative and substitute some of the mayo for ranch dressing or your favorite salad dressing recipe.
These hearty nachos make a great snack and work well as a meal, too! These Loaded Chicken Nachos are LOADED with crispy chips, flavorful chicken, and of course, LOADS of cheese. Quick, easy, totally customizable, and delicious.
Ooey gooey melted cheese, chicken and tomato sauce blended together for a fantastic lunch, dinner or game day snack. At just 25 minutes from start to finish, chicken nachos are an easy way to change up a classic and enjoy something that you already know you love with a little extra oomph.
Video in Urdu:
Video in English:
Ingredients:
2 tablespoons taco seasoning
2 tablespoons chili powder
1 lb chicken boneless
1/4 cup olive oil
8 ounces tomato sauce
1 large bag tortilla chips
3 cups grated Cheese (Cheddar-Jack ideally, I used mixed of pepper jack and cheddar) (you may need more or less)
Topping choices:
1/4 cup jalapeno slices
1/4 cup chopped pitted black olives
3 tomatoes, finely chopped
3 green onions, green and white parts, finely chopped
1/4 cup sour cream
Crispy Chicken Cheese Balls, the name itself says a lot about this snack and you need no further introduction! These chicken cheese balls are everything, there’s chicken, cheese and a crispy coating of breadcrumbs.
These chicken cheese balls can be either baked, air fried or they can be deep fried as well. These cheesy balls are pretty easy to make, just when baking these Chicken Cheese Balls, make sure that you grease the foil generously with oil. Preheat oven at 350 F, and bake chicken balls for 20 – 25 minutes or depending on the size. And also turn around the balls on the baking tray, so that all the the sides are coated with oil. This will ensure that the chicken balls bake crispy, and not soggy.
These Chicken Cheese balls are perfectly make ahead recipe. You can certainly freeze these, either shape the chicken balls and keep them in the freezer, once you are ready for frying, bring them out of the freezer, complete the breading and fry. Or you can freeze them once they’re coated with the breadcrumbs place them on a tray or platter, and freeze them. Then place them into ziplock bags and freeze up to a month.
Video in Urdu:
Video in English:
Ingredients:
1 pound chicken 1/4 cup bread crumbs, or 1 bread slice 1 tsp salt, to taste 1 tsp black pepper 1/2 teaspoon Italian seasoning 1 large egg Mozzarella cheese 1/2-inch cubes Egg wash 1 egg + 1 tbsp water 1 cup bread crumbs 2 tablespoons grated Parmesan, optional
For desi twist: subsitute 1 tsp crushed red pepper with black pepper, or you can add 2-3 tbsp chopped cilantro and tablespoon of green chilies
Simple bread wrapped around a spicy creamy chicken, veggies and cheese filling, coated with bread crumbs. Great for snack, picnics or entertaining guests, and perfect for iftaar...
These bread rolls are easily customizable, you can bring your own twist to the filling, can use all the veggies you like or you have at hand. This filling is so versatile, I used leftover filling to fill puff pastry sheets as well or open face sandwich will definately satisfy your taste buds.
When I shared my Bread Cutlets recipe, few of you were having problem in handling wet bread, this recipe will solve that problem for you.
With a crispy outer layer and a soft, mushy center, these cutlet can easily become a part of your daily iftar table!
Video in Urdu:
Video in English:
Ingredients:
Boneless chicken 1 lb (cooked with ginger and garlic and green chilies)
Butter 3 tbsp
All purpose flour 3 tbsp
Salt and black pepper
Milk 1 cup
Onion chopped 1/2 cup
Corn 1/2 cups
Chopped cilantro 1/3 cup
Chopped green chilies 1 -2 tbsp
Bread slices 12-15 slices
Egg - for coating
Bread crumbs
When I shared Beef Burritos recipe, I mentioned that I will share another recipe using same beef. Today I twisted shredded burrito beef with some added Pakstani touch and making these Shredded Beef puffs or turnovers. Flaky, soft, spicy and delicious! You will love these spicy beef puff pastries
As I already mentioned you can get creative and make all kinds of delicious meals with your Mexican shredded beef . If you stash this burrito beef in your freezer quick snack or meal will be ready in few.
Puff pastry treats are my family favorite especially girls love them. These meat stuffed puffs, chicken puffs, potato stuffed, Nutella stuffed puff pastry or pizza stuffed puffs (basically pizza sauce and cheese with choice of meat).
If you’d like to make these puff pastries a few months ahead of time, arrange them unbaked on a baking sheet and place in the freezer till frozen through. Place them in a freezer bag or in an airtight container and you can keep for up to 3 months. Whenever yon want to eat just pop these on a baking sheet and bake straight from frozen
The puffed up, melt in the mouth and crispy pastry layers along with the beef filling was irresistible and tasted delicious.
Beef Burritos make the perfect entrée for any occasion! Tortillas filled with super tasty seasoned sheredded beef and other fillings of choice. These Burritos are a brilliant freezer standby because they are just as good made fresh or frozen then reheated. Its a hearty recipe that is great for crowd! I mean, who doesn’t love Mexican food?
Shredded Beef Burritos is a recipe that can be made ahead of time and pulled together whenever you’re ready. All that’s left is throwing a few toppings, diced tomatoes, salsa, sour cream, cilantro, extra cheese, and maybe some onions, on top.
If you want to make it a Mexican meal add cheesy spanish rice or zesty cilantro lime rice either one taste amazing with the burritos.
You can get creative and make all kinds of delicious meals with your Mexican shredded beef – tacos, obviously, burritos, or even better, burrito bowls. I added a little bit of desi touch to this shredded beef and recently made a beef puffs or turnovers, they are great for iftar. You might even want to stash some of this beef in your freezer for a lazy rainy day.
Once you get the burritos filled and rolled. Roll burritos individually in aluminum foil. Then refrigerate or freeze them for later. Misting burritos with baking spray helps create a crispy outside on the burritos. Burritos can also be set in a baking dish, covered with cheese and baked. Or smother burritos with enchilada sauce, cheese, and bake.
Video in Urdu:
Video in English:
Ingredients:
3 garlic cloves, minced
1 serrano chile, minced
1 tablespoon soy sauce,
1 tablespoon Worcestershire sauce
2 tablespoons water
4 tablespoons fresh lime juice
1 teasppon salt and
1/2 teaspoon freshly ground black pepper
1/2 cup olive oil
1 (2 to 3-pound) skirt steak/ iron steak, trimmed and cut into pieces
3 tablespoons vegetable or olive oil
1 1/2 cups diced onion
1 cup diced red bell pepper
2 serrano chiles, minced
1 cup beef broth/ water
1 can diced tomatoes with juice
1/2 teaspoon dried oregano
12 (6-inch) flour tortillas